Saturday, November 22, 2008

Anyone know how to remove a knitting curse?

... because I've apparently been hexed. Or at least the project I've been working on today has been cursed. I'm working on a Christmas gift -- small, not too terribly complicated, and something I've made before. But I just can't seem to get past row 5 without having to rip it out! First I discovered that I had several cables twisted in the wrong direction. I tried to frog just that one row, but couldn't manage to get the stitches back onto the needles, so I gave up and pulled the whole thing out. Next time around, I cast on the wrong number of stitches. I decided to just decrease to get rid of them and press on ... until I messed up the cable pattern again. Once again, I tried to just rip back a row or two, but ended up ripping out the whole thing. Tried again, and somehow ended up with a huge gap in the stitches where I joined to knit in the round, so I ripped it out once more after two rows. Next time around, I started knitting row 1 with the yarn tail. Tinked it back ever so carefully and resumed knitting. Then I started knitting with the tail again on row 2, and yet again on row 3. AAARRRGH!!

I've finally gotten through the first 5 rows with no obvious mistakes. If I have to rip back one more time, I think the yarn is going to disintegrate, so wish me luck! And let me know if anyone out there knows how to remove a knitting curse.

Monday, November 17, 2008

Experiments with dye

In my recent post about Stitches East, I noted that I had bought some dyeing supplies from Indie Dyer. This past weekend, I had my first opportunity to try them out.

I started by watching The Superwash Manifesto. This 70-minute instructional video was made by Jenna (the Indie Dyer) and Cheryl Potter of Cherry Tree Hill Yarns. I’m so glad I took Jenna’s advice to buy this. In the past, when I’ve read about dyeing, it seemed so daunting – using chemicals and additives I’d never heard of, and making me think that if I didn’t follow every step to the letter, all the dye would bleed right out of my yarn, or everything would turn to mucky brown. Jenna and Cheryl, however, do a great job of making the dyeing process much more approachable. After watching, I was ready to jump right in.

For my first project, I pulled out a skein of KnitPicks bare superwash merino sock yarn – I had bought it for a project that called for just a little bit of white yarn, so I had almost the full skein left. I decided to try fairly bright colors on this one, so I mixed up some squeeze bottles of kiwi, rosebud, robins egg blue, and sky blue dyes. I put the yarn into a big shallow pan, and started squirting the colors on, letting them merge just a little where they joined. After heat setting the yarn in the microwave, I rinsed out the excess dye and let the yarn hang to dry. The great thing about starting out with a superwash yarn is that I could feel free to manhandle it as I dyed and rinsed without having to worry that it would felt. Here’s the end result:


After the sock yarn, I wanted to experiment with some roving. I rummaged through my (way too big) stash of fiber, and found a bag of undyed wensleydale. This time, I went for subtler, more fall-like colors, using nutmeg, golden pineapple, and a little bit of sky blue. The blue ended up merging with the nutmeg and pineapple to form a soft green. The end result looks a lot like the colors I was seeing as I worked on a table out in my back yard.


The end result really reminded me of something, but I couldn’t figure out what. Finally, after staring at it for a couple of days, I realized that it looks very similar to the colors in the Yarn Harlot’s One Row Scarf.

To round out my experiments, I got some loose kid mohair locks that I had bought from the Martha's Vineyard Fiber Farm. I had to pick through these a bit to pick out some vegetable matter and loosen them up. I did one batch using rosebud and kiwi,


and another using kiwi, golden pineapple, and sky blue.


I’ve got one more skein of undyed yarn on hand, and a fair amount of white wool and mohair … going to have to restrain myself from buying lots more to play with until I spin and knit some of what I already have!

Sunday, November 16, 2008

Lining Tutorial -- how to construct a lining for a flat-bottomed rectangular bag


A handknit bag with a beautiful lining is much more polished and professional-looking. Take a look at this felted lattice bag – it wouldn’t be nearly as nice without that sumptuous black silk brocade.


Making a lining isn't difficult at all.

Step 1: Choose and prepare the fabric

Start by selecting a lining fabric that suits the style of your bag. Is the bag small and elegant? Try a silk dupioni or heavy silk brocade. Is the bag large and sporty? A heavyweight cotton might be a better choice. If the bag has a lot of color or texture on the outside, you may want a solid color, or a subtle woven design. If the bag itself is plain, you could choose a print for the lining.

Once you’ve got your fabric, cut it to the following dimensions:
Width of lining = width of bag + depth of bag + 1 inch for seam allowance
Height of lining = twice the height of bag + depth of bag + 1 inch for seam allowance

Step 2: Sew the side seams

Fold the lining fabric in half lengthwise, right sides together. With the folded edge at the bottom, stitch up the two sides using a ½ inch seam allowance.


Press the seam allowances open.


Step 3: Construct the gusset

You now have a flat envelope, open at the top. In order to make the lining match the shape of the inside of the bag, you need to add a gusset to the bottom. Take a corner of the lining and shape it into a point.


Measure out a triangle whose long side matches the depth of your bag. In this case, the lining is for a bag 2 inches deep, so I've marked off a triangle that's 2 inches at the top.


Press the triangle into place, then stitch across like this.


Do the same on the other side, and you’ll have your two gussets. Your lining now has a flat bottoms, just like your bag. The gusset looks like this from the right side:


(I know that's not the same lining -- I forgot to photograph the white one!)

Step 4: Fit the lining into the bag

Fold the raw edge over to the wrong side. Fit the lining into the bag, right side showing, and check to see if the top edge of the lining is where you want it to be in relation to the top edge of the bag. Adjust the top folded edge as needed to get the look you want – the lining could come right up to the very edge of the bag, or you might prefer to have a ½” or 1” gap. When you’re happy with where the top of the lining falls, sew it into place with a running stitch or whipstich.


Step 5: Admire your beautifully lined bag!


Tuesday, November 11, 2008

Stitches East 2008

This past weekend, I spent two days at Stitches East in Baltimore. 48 hours of knitting heaven! On Friday, I had two classes. The first, taught by Gwen Bortner, was on revising patterns to match the gauge of your own yarn and knitting. Gwen was a wonderful instructor, and I found the class very useful. It would have been even more useful a few weeks ago when I was working on the Debbie Bliss v-neck slipover -- I didn't like the result when I knit to the specified gauge, and I had to pretty much just wing it when I decided to make the sweater in a looser gauge.

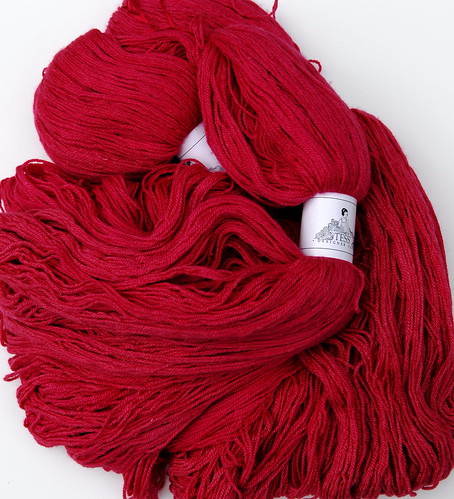
During the lunch break, I raced off to the marketplace, and scored some absolutely gorgeous yarn from Tess. It's "silk and ivory," a blend of 50% wool and 50% silk. The raspberry color (not very well reproduced in the photo, unfortunately) is my absolute favorite color for clothing. I"m not sure what I"m going to make with it yet, but I bought enough for a sweater.


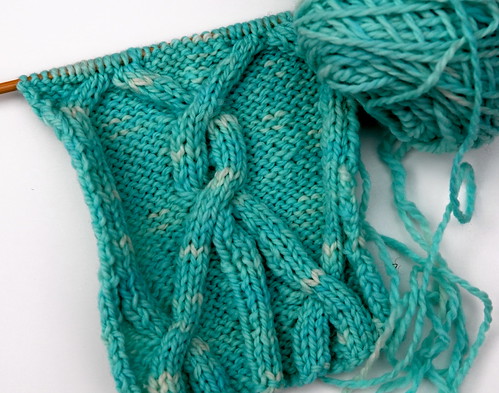
After lunch, I had a class on designing cables, with Fiona Ellis. Here's what I knit in class, just made up on the fly:


I had a bit of time for more shopping at the marketplace after class, but not nearly enough, since it was only open for about an hour after I finished.

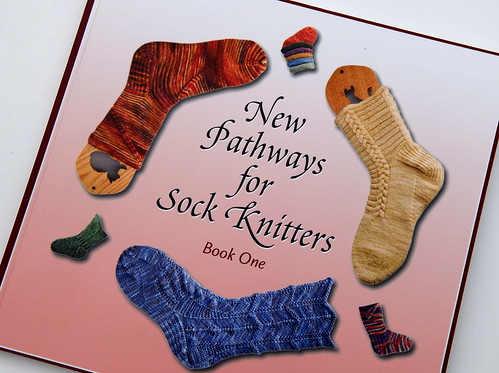
On Saturday morning, I took Cat Bordhi's class on knitting the Coriolis Sock in her latest book, New Pathways for Sock Knitters.


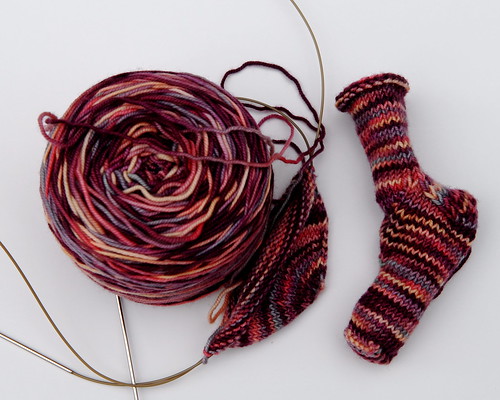
In order to have a chance to finish an entire sock in three hours, we made these wee little baby-sized socks:


On the needles, you can see the full-sized Spiraling Coriolis that I started when I got home. The yarn is Socks that Rock mediumweight, Faulty Dyer colorway. The Coriolis sock is knit from the toe up, with a swirling band that wraps across the instep, and can continue spiraling around the leg if you choose that variation.

As I expected, Cat's class was informative and well-taught, with lots of little tidbits of knitting knowledge scattered throughout. One great piece of information I learned in connection with the class is that she has posted several instructional videos on YouTube -- we had to watch some of them for our pre-Stitches homework. You should check them out, just search "Cat Bordhi" on YouTube. That little bit of a Coriolis sock on the needles has now grown up past the ankle, but I haven't had a chance to take another photo.

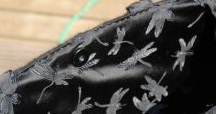
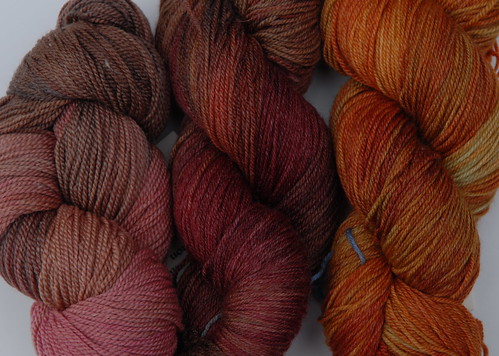
With class over, I finally got to spend as much time as I wanted in the marketplace. So much to see! It's like being in the world's largest yarn shop. Despite my resolve on Friday to resist the call of sock yarn, I succumbed at The Sanguine Gryphon's booth. And not just to one skein, but to three. But seriously, who could have resisted these amazing colors, especially after having just left a sock knitting class? I only wish this photo showed how subtly gorgeous they are.

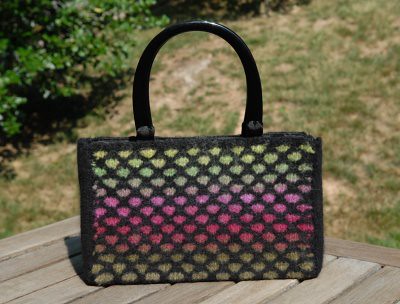
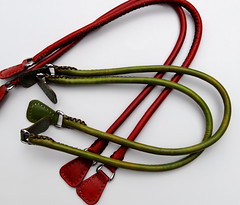
I also picked up some leather bag handles, fun reading glasses, and pattern booklets.


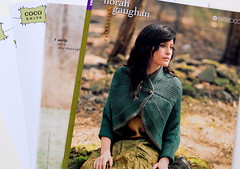
The Webs booth had samples of several of the sweaters from the Norah Gaughan booklet, and they were so much more beautiful in real life than they looked in the booklet. In particular, there's a cardigan with a big folded over collar that's absolutely stunning when you can get close enough to see the stitch pattern at the collar and cuffs.

One last purchase -- dyeing supplies. I got some dyes, and an instructional video, and some undyed sock yarn to practice with from Indie Dyer. I'm planning to try dyeing some Blue Faced Leicester fiber for spinning.


Stitches East moves to Hartford next year. I know a lot of people are disappointed that it won't be in Baltimore, but I've got family in New England, so I think I'll still be able to go. I'm hoping that I can convince my mother to go with me -- after all, she's the one who first taught me to knit.