Friday, February 20, 2009

Little Bunny Foo Foo

Little Bunny Foo Foo, hopping through the forest, scooping up the field mice and bopping them on the head. . .

Two years ago, I decided to join the insanity at the Maryland Sheep and Wool Festival by lining up at The Fold to buy some Socks That Rock yarn. Sure, you can buy it online, but I thought it would be fun to see lots of colorways in person. The thing is, there was such a crush of people in the booth, that I got overwhelmed and completely forgot to look for the one color I knew I wanted to see – Little Bunny Foo Foo. (Really, how could you not love a yarn called Little Bunny Foo Foo?) So while I was in line waiting to pay, I saw someone holding a skein, and asked her to pass one out to me. The woman behind me saw the yarn being passed over, and told me that she had used a skein of the same colorway to knit Monkey socks, and that she was really pleased with them. So I made a mental note to check out the Monkey pattern for this yarn.

I seem to buy sock yarn a lot faster than I knit it, though. So finally, nearly two years later, I pulled out my Little Bunny Foo Foo, printed out the pattern, and started on my socks. Monkey turned out to be a great pattern to knit – more interesting than simple ribbing, but not so complicated as to require my full attention.


This is my first completed pair of lace socks (let’s not speak of the other pair, 75% finished, languishing among my UFOs). The design is pretty, but simple enough for a lace novice.


I’m still not sure that I’m ever going to be a big fan of lace knitted in multi-colored yarn, but I do like my Little Bunny Foo Foo Socks.

And that name is going to make me smile every time I wear them.

Saturday, February 14, 2009

Happy Valentine's Day


Pattern: Heart Sachet, by Vicki Sever for Interweave
Yarn: Koigu premium merino
Needles: size 1, bamboo DPNs
Made for Valentine's Day for my mother.

This pattern was a bit of a challenge to get started on, mainly because I have no three-dimensional spatial sense whatsover. But after the first couple of squares were done, it was fairly easy to see how all of the pieces fit together. After square 1, all the subsequent squares are attached by picking up stitches from earlier squares -- the only seaming required is to close up the top. The sachet is filled with lavender, and smells wonderful. I really like the cute, tiny i-cord for the hanging loop.

Happy Valentine's Day!

Sunday, February 1, 2009

O'Keeffe

Several years ago, I stayed at a house in Provence that had a little field of poppies out front, and I’ve loved these bright and cheery red flowers ever since. When I decided to knit a bag with a floral design, the poppy came immediately to mind. Once this bag was finished, it reminded me of Georgia O’Keeffe’s paintings of oriental poppies, and so I named it in her honor -- the O'Keeffe.


Because I'd only designed one pattern of my own previously, I decided to experiment with this design by making a smaller version first -- that way, I'd have spent less money on yarn if I decided I didn't like it. I did like it, though, and that experiment gave me the idea of enlarging the bag by simply knitting the larger version with two strands of yarn held together. As a result, the large bag knits up just as quickly as the smaller one, and the extra yarn gives it the extra body you need for a large tote.


For the yarn, I turned to Ella Rae Classic, which has a gorgeous array of colors in a basic worsted weight yarn. The background color is "eggplant" -- a really versatile almost-gray shade of purple. It functions as a neutral, but with a more lively color than a pure gray. It sets off the red flower and green leaf beautifully. The red leather handles are from Grayson E -- expensive, but worth it for a special project.


The bag is knit all in one piece -- starting at the bottom of the stem as seen in the picture above, then wrapping around to the other side, ending with the poppy blossom. After knitting this long rectangle, I picked up stitches for the sides, knit them at right angles to the main section, and then seamed the bag together and felted it.

Would you like to make an O'Keeffe of your own? I've posted the pattern online, and added it to the Ravelry pattern database. Let me know if you make one -- I want to see pictures!

Saturday, January 24, 2009

Make hay while the sun shines

...or for the modern-day blogger, make photos while the sun shines.

I like to take my photos in strong, natural sunlight. That's why the background of most of my fiber projects is the picnic table in my back yard. But strong, natural sunlight has been a scarce occurrence around here lately. The cloudy, gloomy winter days have far outnumbered the clear, sunny ones. So even though I've finished a number of projects, the blog has been neglected because I couldn't get any good pictures.

This afternoon, the sun finally came out! I grabbed the camera, and an armload of projects, and ran outside. But as soon as I got set up, the sun vanished again.

I took everything back indoors, and as soon as I did, the sun came out again.

So back outdoors I went, where I managed to get a quick set of photos taken. I'll be so glad when spring comes, and the sun returns with it!

So ... let's see what we've got.

First, some weaving projects. When I put up my last post, my first woven scarf was still on the loom. Here it is, all finished.


The edges gradually got more even as I worked, slowly getting the knack of making a neat selvedge. I think it's fairly nice for a first project.

For my second project -- another scarf -- I got more adventurous and started experimenting with color patterns. This scarf is woven in two shades of Valley Yarns Stockbridge yarn, periwinkle and chocolate.


This houndstooth check was much easier than I would ever have guessed -- I just alternated two strands of periwinkle with two strands of chocolate in both the warp and the weft. Here's a closeup of the checks.

The next challenge was to try a new fiber and a looser weave. This lightweight little scarf follows directions in the book Weaving Made Easy. It's actually two scarves layered on top of one another.


One uses Kidsilk Haze in "heavenly" for both the warp and weft, while the other uses that same Kidsilk Haze for the warp with a weft of Kidsilk Night in "moonlight." The Kidsilk Night is a new yarn for me -- basicaly Kidsilk Haze with a little bit of sparkle in it. It's really beautiful.

And there's been knitting, too. I continue to work on the Kusha Kusha scarf that seems like it will never be done. Where did I ever get the idea that knitting with thread would be fun? Oh right -- it's because the result is so stunning. I've also finished the knitting portion of the Pillow of Sei Shonagon, and am working on the sewing part.

Some projects have even gotten finished. I found out over the holidays that my niece was going to have a baby, so of course I had to knit something tiny and adorable. I turned to one of my very favorite knitting books, Knitalong. You really should seek out this book if you haven't seen it before -- I find myself wanting to make nearly everything in it, and it's enjoyable reading as well. I finally had a reason to make the adorable Victorian Baby Bonnet.


This sweet little hat took only a couple of nights to make, and the lace pattern is very simple to follow. This one is knit in Rowan RYC silk cotton, in "cucumber," with the edging knit in "peat." Since the contrast color is used for only one row of edging, I had nearly a full ball of brown left. The obvious use for it was to make another hat, this one brown with green edging.


For now, I'm working on a pair of socks -- I'm the 8 millionth person to try out the "Monkey" pattern. Maybe I'll manage to get a photo on the next sunny day.

Thursday, January 1, 2009

A new fiber arts adventure

The book Intertwined has a couple of interesting woven projects using handspun, non-traditional yarns -- a scarf and a vest. Ever since I first saw them, I've been intrigued by the idea of weaving with my handspun yarns. I was curious about the way that non-traditional yarns might look in a woven fabric, and it also seemed like a good way to make small amounts of handspun go farther than with knitting.

So my Christmas wish list this year included a 24-inch Kromski Harp Loom.


Of course, it didn't quite look like this when I found it under the tree -- it took about two hours to go from looking like a box of loom parts to looking like an actual loom. Even with the instructional video, I found it pretty confusing to assemble, but eventually managed to get all the parts in the right place.

I knew I was going to be in the neighborhood of Webs a few days later, so I decided to pick up some yarn there for my first couple of projects. Yarn choice was my first weaving challenge -- with knitting, I'm generally using one yarn at a time, so I'm not used to having to envision how two different yarns will look when worked together. After a full hour in the store, I finally settled on yarn for three scarves. I've got some robin's egg blue and chocolate brown baby alpaca, a pink/brown/cream variegated to mix with pink and brown solids. And for my first project, I picked out two skeins of Cascade heather, in colors 9451 Lake Chelan and 9452 Summer Sky.


It's not exactly an adventurous combination, but it does look pretty nice.

It took quite a while to get from the empty loom to a piece of relatively even weaving, though. There's quite a lot to figure out right up front.

One thing I wish I'd figured out sooner -- which is the front of the loom, and which is the back. I managed to warp the loom backwards and had to rewind the warp to sort it all out. I'm pretty sure I won't make that mistake again!

It took me at least a couple of hours to warp the loom for a scarf, although I'm sure it will be much quicker the next time around. I had almost all of the yarn measured out when I somehow let some of it pop off the warping board, and I had to start over again. It was a little scary holding all that carefully measured and wound yarn on my hand as I tried to figure out how to attach it to the loom, but it all went on pretty smoothly (except for the fact that I attached it the wrong way around, as noted above). My daughter helped, and we managed to get all the yarn on without tangling.

Finally, it was time to wind some weft yarn onto a shuttle and start making fabric. Those first several inches were quite a mess -- wavy rows, loopy selvedges, and uneven spacing between rows. Eventually, though, the edges became straighter and the selvedges became less loopy. Still not exactly professional looking, but much improved.


I've made about three feet of passable fabric so far, and I think this scarf may actually be wearable when it's done. I'm hoping that washing it will work some magic to even everything out, the way blocking does for knitting.

After I finish weaving the yarn I bought at Webs, it'll be time to try out some handspun.

Wednesday, December 31, 2008

Those Christmas projects I couldn't show before

I did lots of knitting this month, but very little blogging, because most of the projects were Christmas gifts.


Now that Christmas is over, I can finally show what I was working on.

There were some sewing projects. A pear-shaped pincushion, for my mother-in-law the quilter. This is from a Heather Bailey pattern.


... and some patchwork picture frames, from Denyse Schmidt Quilts.


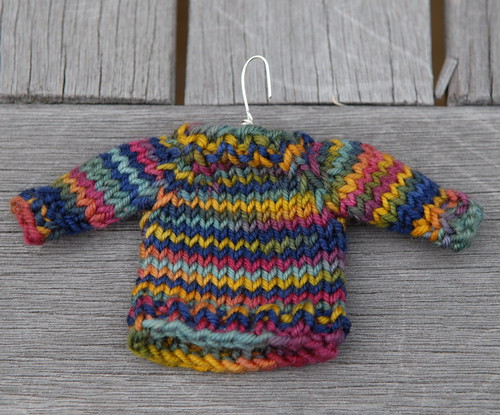
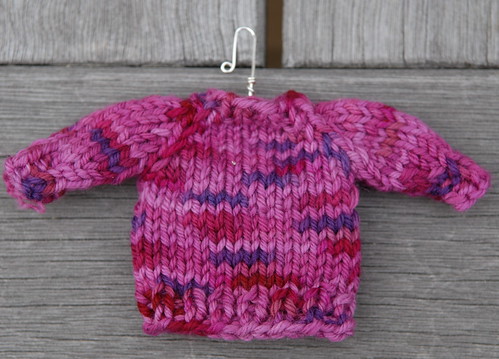
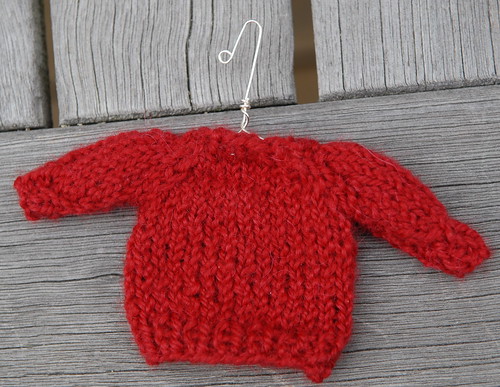
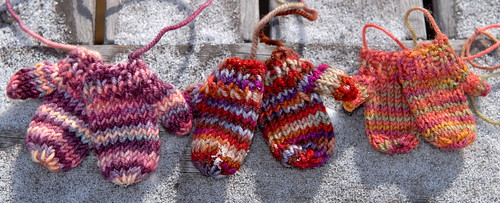
Then there were lots of knitted ornaments. There were mini mittens, shown in the previous post, and tiny sweaters on silver-wire hangers, pattern here.


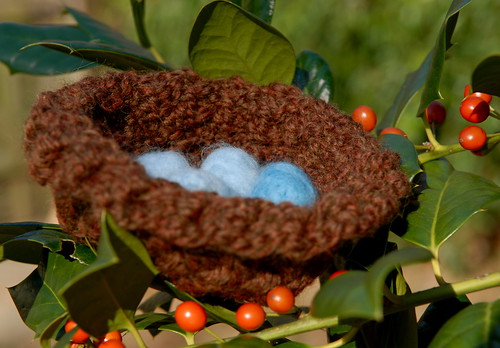
According to German folklore, finding a bird's nest in your Christmas tree is good luck, and will bring your family health and happiness throughout the year. That inspired these knitted nests, with little blue felted eggs.


The pattern for the nest is in Closely Knit -- I modified the design slightly to make a smaller, shallower nest. The book includes a pattern for knitted eggs, but I made mine by needle felting some blue merino roving.

I made my mother a simple triangular shawl from some salmon-colored hand-dyed mohair boucle from Mohair in Motion. This one really went down to the wire -- I finished it at about 11 pm the night before I had to give it to her. Unfortunately, in the rush, I forgot to take a photo when it was done. I'll have to try to remember to get one later.

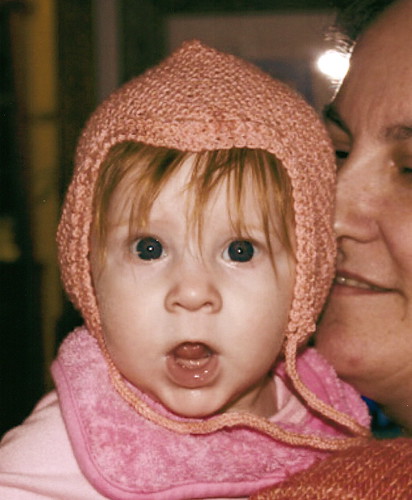
And here's one final photo -- the pilot cap from the previous post, modeled by my four-month-old great-niece. Isn't she adorable?

Friday, December 12, 2008

A difficult time for blogging

It's a difficult time for blogging about crafts projects, because I've been spending so much time working on Christmas gifts -- and I wouldn't want to spoil the surprise by showing them here. And on top of that, I've been working on a project that I'm trying to get published, so I can't show that yet either.

As is so often the case, I've been overcome by a last-minute urge to give handmade Christmas gifts. This feeling tends to strike somewhere around Thanksgiving, rather than in July when it would be more useful. I've been knitting and sewing up a storm since Thanksgiving weekend, alternating back and forth as I get tired of one project, or my hands start to ache. I don't think I've taken on more than I can handle, but we'll see if I'm still knitting on the car ride to visit family!

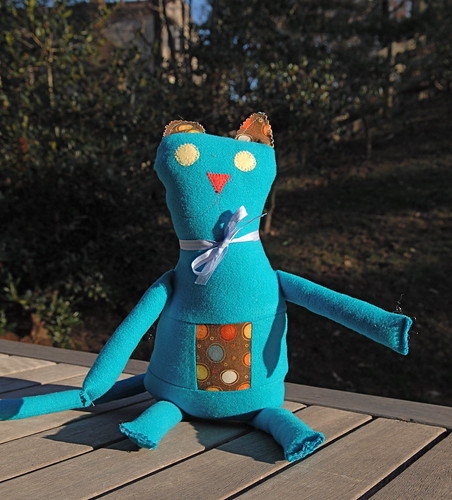
I think I can safely show a couple of projects, since their intended recipients are much too young to be reading my blog. The first is from the book Denyse Schmidt Quilts, Steve the Cat.


I think he's pretty adorable, don't you?

And then there's this little pilot cap.


I'm afraid it doesn't really look like much without a baby to model it. Hopefully I'll have a better photo to post later. This is from the second Mason Dixon Knitters book, Knitting Outside the Lines.

There's one more thing I can safely post, some ornaments for our Christmas tree (which hasn't even been bought yet!) Aren't these teeny little mittens the cutest thing ever? They're only about an inch and a half long. The pattern is here, at Pink Argyle.


Well, back to the holiday knitting ... more photos to come in a couple of weeks.