Saturday, February 27, 2010

I'm on Jeopardy next week!

I know I've been absent for months, and ought to be starting out with a post about knitting, or spinning, or sewing. And there will be one of those very soon. But in the meantime, just wanted to let whoever's out there know that I'm going to be appearing on Jeopardy next week! Wednesday, March 3. Will have a longer post with more details about the experience after air date, but in the meantime...tune in to see if Alex asks me about the crafty part of being ACraftyLawyer!

Oh, and if you want to watch, you can find your local air time and station on the Jeopardy web site.

Saturday, October 31, 2009

Rhinebeck, and my post-Rhinebeck vacation

I've been having so much fun going places and making things that I haven't had a chance to update the blog. It's time to catch up.

So…two weekends ago I got to go to the NY Sheep and Wool Festival. I have family in Massachusetts, just two hours away from the festival, so I got to have a great visit, and bring some of them to Rhinebeck with me. My focus this year was on spinning and dyeing.My plan was to buy some natural dyes, and some wool and yarn to use them on. But not yarn … I tried really hard to resist the gorgeous yarns, and amazingly enough, I pulled it off. (The bags bulging with wool top and roving did help me restrain myself. In fact, I only bought one thing that wasn’t on my shopping list, this beautiful cherry case to hold a sock-in-progress:


Since I didn’t know that such a thing existed before I saw it at Rhinebeck, I couldn’t very well have put it on my list, could I? One thing that was definitely on my list was the new 
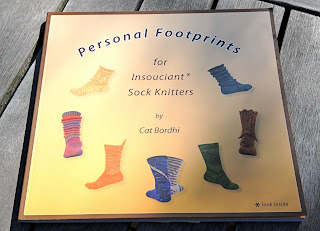
Cat Bordhi sock book – I haven’t tried her latest method out yet, because I’m already in the middle of a pair of Cookie A socks, but I’ll definitely use Cat’s book for my next pair.

With help from the Ravelry discussion boards, I found a couple of vendors selling natural dye materials, and chose some kits of Earthues dyes from Long Ridge Farm. I got two kits – one containing osage orange, quebracho, and logwood, and the other an “overdyeing kit” containing indigo, cochineal, and pomegranate. Once the dyes were in my bag, I started focusing on fibers to use them on – eventually buying two skeins of fingering weight alpaca, 2 pounds of rambouilllet top, and about a pound and a half of wool roving of different breeds.

And these bags of “wool” – they’re actually maple cotton candy, and it was delicious! I did do a double-take when I first saw someone eating some of this, because it really did look like a bag of wool.
As much fun as I had at Rhinebeck, the real fun was when I got home … because I’d arranged to take the week off to play with all my new fiber goodies. For the next several days, I was free to knit, spin, and dye all day long. And I really lucked out – the weather was warm and sunny most of the time, so I was able to sit out on my back deck with my spinning wheel while I was tending the dye pots. First thing when I got back home, I went out to buy a hotplate so that I could work outdoors (by the end of the week, I’d picked up a second one so that I could have two dye pots going at once.)

Day one was devoted to mordanting the fibers I was planning to dye later in the week – heating them in an alum solution that helps hold the dye. It wasn’t until day two that I actually got to break open the dye kits. The first colors I tried were quebracho red


and logwood gray.
The quebracho made a really gorgeous warm red, definitely a color I want to repeat. As for the logwood, I ended up putting a bit more dye than I’d really intended, but it made a great dark purple. I’ve saved the dyebath to reuse, and am curious what the weaker solution that’s left will make. The next day, I used the osage orange and cochineal dyes.


I used the cochineal first on one of the skeins of alpaca from Rhinebeck, and then I reused the exhaust bath on some roving.


The yarn dyed with osage orange is half a skein of Cascade EcoWool, and undyed Peruvian wool that comes in fat 8 ounce skeins, perfect for dyeing yourself.

I think we’re up to Friday now – I dyed another skein with osage orange, so that I could overdye it with indigo later, and also dyed some roving with pomegranate.


Saturday it rained, so I spent the whole day on spinning. By the end of the week, I’d spun these three skeins (and boy did my back ache!):


Sunday was devoted to indigo dyeing, and I’ve got lots of photos, so stay tuned for my next post to see all the beautiful blues.

Sunday, August 30, 2009

A productive three-day weekend

It's been a busy and productive 3-day weekend (I took Friday off from work) -- jewelry, knitting, and spinning. Nothing finished in the knitting category, so no photos there. But here's what I've been spinning:


4 ounces of merino and bamboo top, spun into a 2-ply yarn. Handdyed by Miss Babs, purchased at Fiber Space. I haven't skeined it yet, so I don't know what the yardage is. I've got another entire 4-ounce braid of fiber left to spin. I hadn't done any spinning in quite a while, and my spinning muscles are really aching now! I'll have to give my back a rest for a few days before I tackle that other braid.

Now, the jewelry.

I started out with a beading project, using some of the brass findings that I got at BeadFest.


This is made with a brass bird charm, brass chain, aquamarine beads, and oxidized sterling silver wire.


After the necklace, I started playing with some polymer clay, inspired by a new book that I picked up at BeadFest. It's called Ancient Modern: Polymer Clay + Wire Jewelry, by Ronna Sarves Weltman. Ronna stopped by class last Sunday with some polymer clay pieces that she had made using Objects and Elements bezels, and they were so gorgeous that I couldn't resist buying her book.

Here's my first piece -- a polymer pendant with silver wire, strung (for now) on a silk cord.

I'm not sure about this one yet -- maybe a glaze coat to bring up the color would make me like it more. I think I blended the clay a little too much, so that the colors ran together and lost their vividness.

The next piece combines metal with more polymer clay, in the same color scheme, held together with a brass screw. This one's on a silk ribbon for now, as well, but I haven't really decided how to finish it off. Also, while I like the basic idea, I may redo the polymer pieces.


The final piece of finished jewelry for the weekend is a bracelet, using rubber cord, sterling silver, a brass bezel with glass bead, and sari silk. I can't really claim credit for this design, as it was published in the Handcrafted Jewelry magazine that I bought at -- BeadFest, of course. So it's not original, but it's a great design, and I already had all of the components on hand.


It's Sunday night now, and I've started in on one last piece -- but this one involves resin, so it's going to take a couple of days to get all of the layers poured and cured. Hopefully, I'll have photos for my next post.

...and finally, here are a couple of pairs of cufflinks that I actually made a couple of weeks ago, as a birthday present for my husband. One pair made with NY subway tokens, and the other with 10 franc coins -- neither of which is in circulation any more.


Saturday, August 29, 2009

BeadFest Philadelphia

Most of what I've posted here has been fiber-related -- knitting, spinning, dyeing, sewing. But this past weekend, I got to spend some time on another hobby that I haven't done much of in a while -- jewelry making.

Taking a class is always a great way to get inspired again, and that's what I did. I took a class called "Rings, Relics, and Riveting," with a wonderful teacher and jewelry artist, Susan Lenart Kazmer. The class was part of BeadFest Philadelphia, a huge bead and jewelry show with lots of classes. So on Saturday, I arrived early to check out the marketplace, where I of course spent more than I'd intended to on materials and supplies.

Then on Sunday, I had my class. Here's the course description:

Combine layers of metal sheet, objects, paper, rocks and fiber build unusual wearable rings. Focus on cold joining techniques such as riveting, prongs and staples. Add height and dimension by use of negative and positive space. Fabrication of metal by hand and tools such as disc cutters and forming block.
We started with a simple design that involved stringing various types of beads (loosely defined as anything that had a hole in it, or could have a hole drilled into it) onto a long piece of brass wire that was then hammered and shaped into a ring shank. Here's the result of mine, using a hammered copper disk and a chunk of hematite.


Then we started using rivets, tiny nut & bolt sets, staples, and prongs to hold rings together. I'd brought along all sorts of odd materials that I thought I might be able to add to a ring, and ended up focusing on a little bag of rocks that I'd brought back from a vacation to Prince Edward Island a few years ago. I made my first PEI rock ring with copper, a pale blue glass bead, and a silver-colored metal spacer bead:


I love the patina that the copper got from heating it with a torch, and the slightly irregular hammered edges of the metal disk. Unfortunately, though, in the process of riveting it all together, I cracked the rock. I haven't had the heart to take it apart yet, but at some point I'll probably put in a new rock to replace the cracked one.

After that, I decided to break out the expensive supplies -- a sheet of sterling silver. I made another ring very similar to the copper one, but this time I'd learned some things about how not to break the stone (give it better support in the metal disk, and don't hammer so hard on the rivet!) Here's the result:


It's kind of ridiculously huge compared to what I'd ordinarily wear as a ring, but I really like the color and texture of the metal, the shape of the silver disk compared to the shape of the rock, and especially the fact that it will always remind me of a wonderful vacation. And believe it or not, it's surprisingly wearable.

So ... it's Saturday now, and I took yesterday off from work to play with my jewelry supplies. So expect more jewelry photos soon!

Wednesday, August 26, 2009

Mimi Kirchner and her wonderful, whimsical creations

Did you like my teacup pincushion and felt doll? Both are from patterns by Mimi Kirchner -- check out this Etsy video about Mimi and her work.


(I know I've been horribly delinquent in posting any of my own projects -- I'll get some photos up here this weekend for sure. I made some great jewelry this past weekend that I'd love to show off as soon as I can get it photographed.)

Saturday, July 4, 2009

The "Jeanne G. Tour" tote bag

I guess it's been a while since I've managed to finish a project ... but I've been on vacation all week, so I've finished a few. Some still haven't been photographed, though, so for today we have just one -- the "Jeanne G. Tour" tote bag.


This bag is based on the "road-trip tote bag" in Alicia Paulson's beautiful book, Stitched in Time. The bag was made as a gift for Jeanne G's birthday, and shows the route from where she was born to where she lives now, with french knots marking the cities where her family members live.


Details:
Main body of the bag is cotton twill, bottom is ultrasuede, both purchased at Mood.
Cotton lining fabric and embroidery thread from Purl Patchwork.
Leather strap for the handles from Leather Impact.
Vintage bakelite button purchased at the D.C. Big Flea Market.

Sunday, May 17, 2009

Another project courtesy of Mimi Kirchner

When the Purl Bee published the pattern for Mimi Kirchner's "purl girl" doll, they included a link to her website, Doll. I added Doll to my list of favorites, and have really been enjoying seeing Mimi's delightful projects. The popularity of the purl girl doll pattern encouraged Mimi to write up a pattern for one of her other projects, the Tiny World Pincushion. Naturally, I couldn't resist buying the pattern as soon as I saw it. And those who know how obsessive I can be about craft projects will not be at all surprised to know that I immediately started looking for suitable teacups to make the pincushions in.

I ended up spending a little more money than I'd intended on teacups, but I did find two really lovely ones, that we're really that expensive. (I'm still hoping to score some really inexpensive thrift shop finds.) So here's my first Tiny World Pincushion -- the Tiny House of Violets.


The tree seems maybe a little too plain, so I may replace it with an embroidered one. Still, I think it's really charming. To play up the purple of the violets in the cup, I made the house yellow (purple's complementary color), with a purple door, then scattered violets across the grass. I pretty much followed the basic pattern for this one, but am looking forward to improvising more on the next one. I've got another cup like this, but with a different type of flower on it. There were a couple more similar ones at that consignment shop ... maybe I'll pay them another visit this week.

If you'd like to see more of these sweet pincushions, check out Doll, or the Flickr group that Mimi started.

There's also a new Flickr group for the purl girl dolls.