Wednesday, December 31, 2008

Those Christmas projects I couldn't show before

I did lots of knitting this month, but very little blogging, because most of the projects were Christmas gifts.


Now that Christmas is over, I can finally show what I was working on.

There were some sewing projects. A pear-shaped pincushion, for my mother-in-law the quilter. This is from a Heather Bailey pattern.


... and some patchwork picture frames, from Denyse Schmidt Quilts.


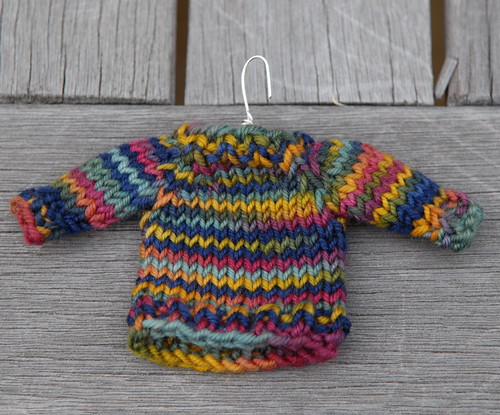
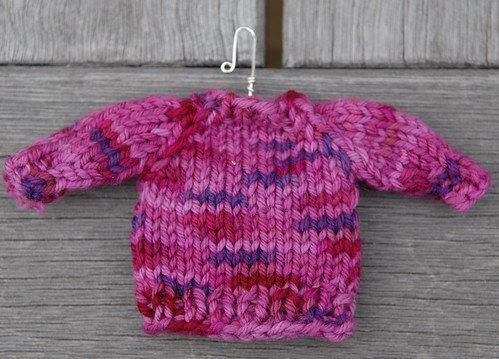
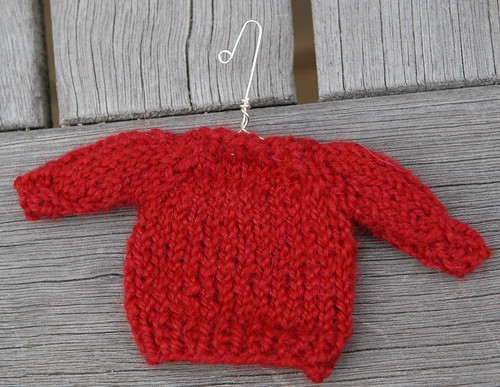
Then there were lots of knitted ornaments. There were mini mittens, shown in the previous post, and tiny sweaters on silver-wire hangers, pattern here.


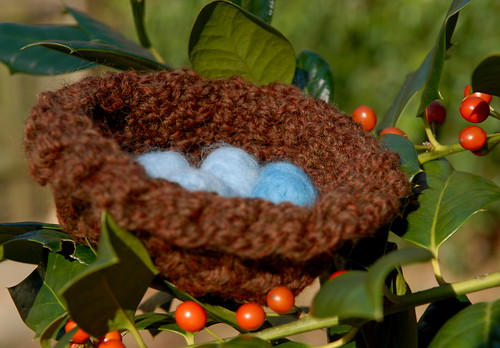
According to German folklore, finding a bird's nest in your Christmas tree is good luck, and will bring your family health and happiness throughout the year. That inspired these knitted nests, with little blue felted eggs.


The pattern for the nest is in Closely Knit -- I modified the design slightly to make a smaller, shallower nest. The book includes a pattern for knitted eggs, but I made mine by needle felting some blue merino roving.

I made my mother a simple triangular shawl from some salmon-colored hand-dyed mohair boucle from Mohair in Motion. This one really went down to the wire -- I finished it at about 11 pm the night before I had to give it to her. Unfortunately, in the rush, I forgot to take a photo when it was done. I'll have to try to remember to get one later.

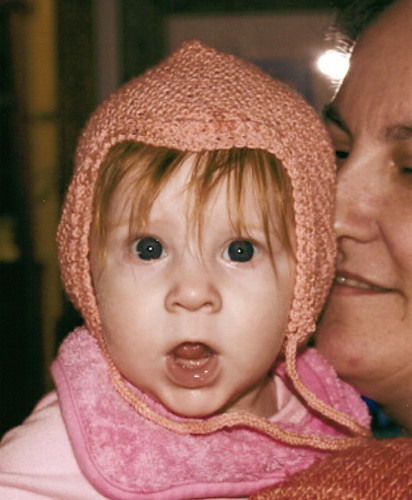
And here's one final photo -- the pilot cap from the previous post, modeled by my four-month-old great-niece. Isn't she adorable?

Friday, December 12, 2008

A difficult time for blogging

It's a difficult time for blogging about crafts projects, because I've been spending so much time working on Christmas gifts -- and I wouldn't want to spoil the surprise by showing them here. And on top of that, I've been working on a project that I'm trying to get published, so I can't show that yet either.

As is so often the case, I've been overcome by a last-minute urge to give handmade Christmas gifts. This feeling tends to strike somewhere around Thanksgiving, rather than in July when it would be more useful. I've been knitting and sewing up a storm since Thanksgiving weekend, alternating back and forth as I get tired of one project, or my hands start to ache. I don't think I've taken on more than I can handle, but we'll see if I'm still knitting on the car ride to visit family!

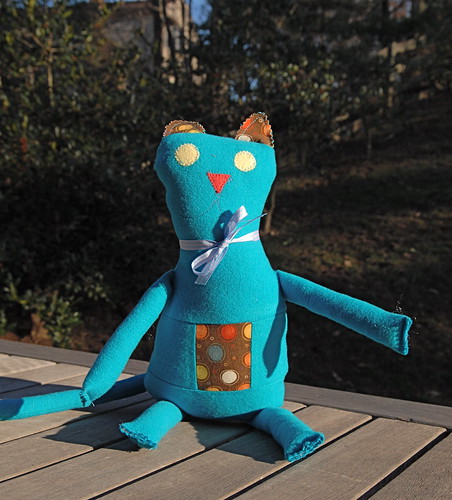
I think I can safely show a couple of projects, since their intended recipients are much too young to be reading my blog. The first is from the book Denyse Schmidt Quilts, Steve the Cat.


I think he's pretty adorable, don't you?

And then there's this little pilot cap.


I'm afraid it doesn't really look like much without a baby to model it. Hopefully I'll have a better photo to post later. This is from the second Mason Dixon Knitters book, Knitting Outside the Lines.

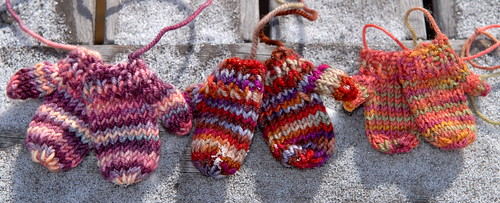
There's one more thing I can safely post, some ornaments for our Christmas tree (which hasn't even been bought yet!) Aren't these teeny little mittens the cutest thing ever? They're only about an inch and a half long. The pattern is here, at Pink Argyle.


Well, back to the holiday knitting ... more photos to come in a couple of weeks.

Saturday, November 22, 2008

Anyone know how to remove a knitting curse?

... because I've apparently been hexed. Or at least the project I've been working on today has been cursed. I'm working on a Christmas gift -- small, not too terribly complicated, and something I've made before. But I just can't seem to get past row 5 without having to rip it out! First I discovered that I had several cables twisted in the wrong direction. I tried to frog just that one row, but couldn't manage to get the stitches back onto the needles, so I gave up and pulled the whole thing out. Next time around, I cast on the wrong number of stitches. I decided to just decrease to get rid of them and press on ... until I messed up the cable pattern again. Once again, I tried to just rip back a row or two, but ended up ripping out the whole thing. Tried again, and somehow ended up with a huge gap in the stitches where I joined to knit in the round, so I ripped it out once more after two rows. Next time around, I started knitting row 1 with the yarn tail. Tinked it back ever so carefully and resumed knitting. Then I started knitting with the tail again on row 2, and yet again on row 3. AAARRRGH!!

I've finally gotten through the first 5 rows with no obvious mistakes. If I have to rip back one more time, I think the yarn is going to disintegrate, so wish me luck! And let me know if anyone out there knows how to remove a knitting curse.

Monday, November 17, 2008

Experiments with dye

In my recent post about Stitches East, I noted that I had bought some dyeing supplies from Indie Dyer. This past weekend, I had my first opportunity to try them out.

I started by watching The Superwash Manifesto. This 70-minute instructional video was made by Jenna (the Indie Dyer) and Cheryl Potter of Cherry Tree Hill Yarns. I’m so glad I took Jenna’s advice to buy this. In the past, when I’ve read about dyeing, it seemed so daunting – using chemicals and additives I’d never heard of, and making me think that if I didn’t follow every step to the letter, all the dye would bleed right out of my yarn, or everything would turn to mucky brown. Jenna and Cheryl, however, do a great job of making the dyeing process much more approachable. After watching, I was ready to jump right in.

For my first project, I pulled out a skein of KnitPicks bare superwash merino sock yarn – I had bought it for a project that called for just a little bit of white yarn, so I had almost the full skein left. I decided to try fairly bright colors on this one, so I mixed up some squeeze bottles of kiwi, rosebud, robins egg blue, and sky blue dyes. I put the yarn into a big shallow pan, and started squirting the colors on, letting them merge just a little where they joined. After heat setting the yarn in the microwave, I rinsed out the excess dye and let the yarn hang to dry. The great thing about starting out with a superwash yarn is that I could feel free to manhandle it as I dyed and rinsed without having to worry that it would felt. Here’s the end result:


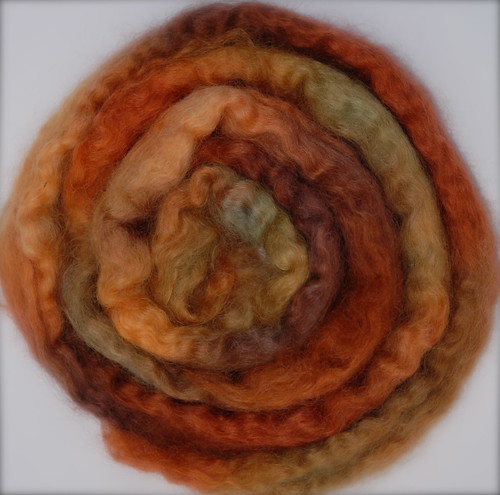
After the sock yarn, I wanted to experiment with some roving. I rummaged through my (way too big) stash of fiber, and found a bag of undyed wensleydale. This time, I went for subtler, more fall-like colors, using nutmeg, golden pineapple, and a little bit of sky blue. The blue ended up merging with the nutmeg and pineapple to form a soft green. The end result looks a lot like the colors I was seeing as I worked on a table out in my back yard.


The end result really reminded me of something, but I couldn’t figure out what. Finally, after staring at it for a couple of days, I realized that it looks very similar to the colors in the Yarn Harlot’s One Row Scarf.

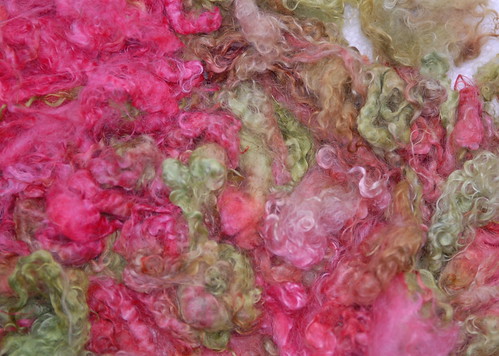
To round out my experiments, I got some loose kid mohair locks that I had bought from the Martha's Vineyard Fiber Farm. I had to pick through these a bit to pick out some vegetable matter and loosen them up. I did one batch using rosebud and kiwi,


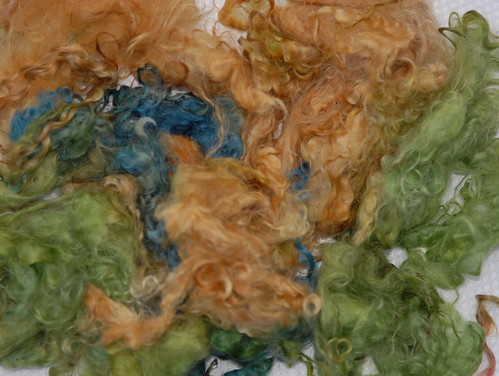
and another using kiwi, golden pineapple, and sky blue.


I’ve got one more skein of undyed yarn on hand, and a fair amount of white wool and mohair … going to have to restrain myself from buying lots more to play with until I spin and knit some of what I already have!

Sunday, November 16, 2008

Lining Tutorial -- how to construct a lining for a flat-bottomed rectangular bag


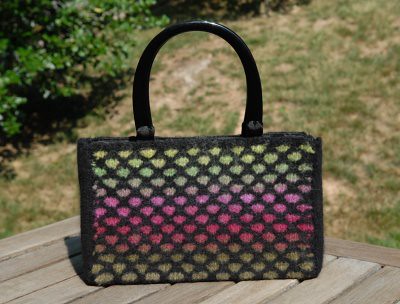
A handknit bag with a beautiful lining is much more polished and professional-looking. Take a look at this felted lattice bag – it wouldn’t be nearly as nice without that sumptuous black silk brocade.


Making a lining isn't difficult at all.

Step 1: Choose and prepare the fabric

Start by selecting a lining fabric that suits the style of your bag. Is the bag small and elegant? Try a silk dupioni or heavy silk brocade. Is the bag large and sporty? A heavyweight cotton might be a better choice. If the bag has a lot of color or texture on the outside, you may want a solid color, or a subtle woven design. If the bag itself is plain, you could choose a print for the lining.

Once you’ve got your fabric, cut it to the following dimensions:
Width of lining = width of bag + depth of bag + 1 inch for seam allowance
Height of lining = twice the height of bag + depth of bag + 1 inch for seam allowance

Step 2: Sew the side seams

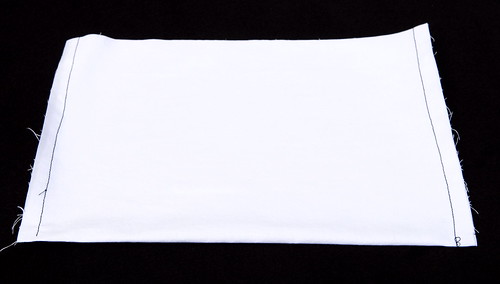
Fold the lining fabric in half lengthwise, right sides together. With the folded edge at the bottom, stitch up the two sides using a ½ inch seam allowance.


Press the seam allowances open.


Step 3: Construct the gusset

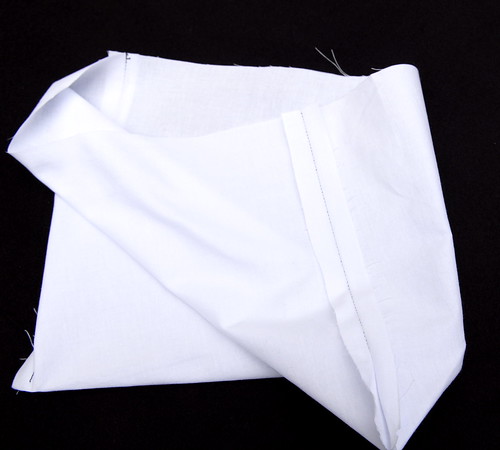
You now have a flat envelope, open at the top. In order to make the lining match the shape of the inside of the bag, you need to add a gusset to the bottom. Take a corner of the lining and shape it into a point.


Measure out a triangle whose long side matches the depth of your bag. In this case, the lining is for a bag 2 inches deep, so I've marked off a triangle that's 2 inches at the top.


Press the triangle into place, then stitch across like this.


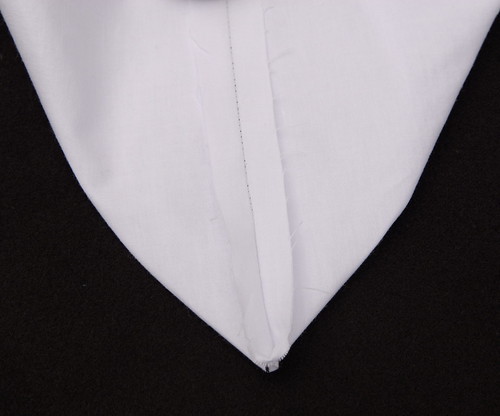
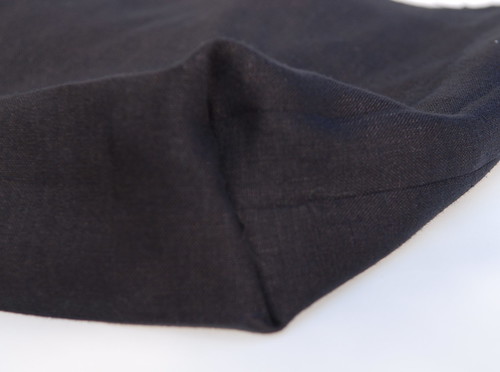
Do the same on the other side, and you’ll have your two gussets. Your lining now has a flat bottoms, just like your bag. The gusset looks like this from the right side:


(I know that's not the same lining -- I forgot to photograph the white one!)

Step 4: Fit the lining into the bag

Fold the raw edge over to the wrong side. Fit the lining into the bag, right side showing, and check to see if the top edge of the lining is where you want it to be in relation to the top edge of the bag. Adjust the top folded edge as needed to get the look you want – the lining could come right up to the very edge of the bag, or you might prefer to have a ½” or 1” gap. When you’re happy with where the top of the lining falls, sew it into place with a running stitch or whipstich.


Step 5: Admire your beautifully lined bag!


Tuesday, November 11, 2008

Stitches East 2008

This past weekend, I spent two days at Stitches East in Baltimore. 48 hours of knitting heaven! On Friday, I had two classes. The first, taught by Gwen Bortner, was on revising patterns to match the gauge of your own yarn and knitting. Gwen was a wonderful instructor, and I found the class very useful. It would have been even more useful a few weeks ago when I was working on the Debbie Bliss v-neck slipover -- I didn't like the result when I knit to the specified gauge, and I had to pretty much just wing it when I decided to make the sweater in a looser gauge.

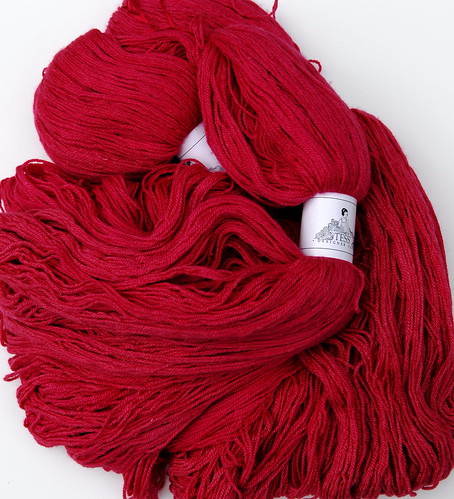
During the lunch break, I raced off to the marketplace, and scored some absolutely gorgeous yarn from Tess. It's "silk and ivory," a blend of 50% wool and 50% silk. The raspberry color (not very well reproduced in the photo, unfortunately) is my absolute favorite color for clothing. I"m not sure what I"m going to make with it yet, but I bought enough for a sweater.

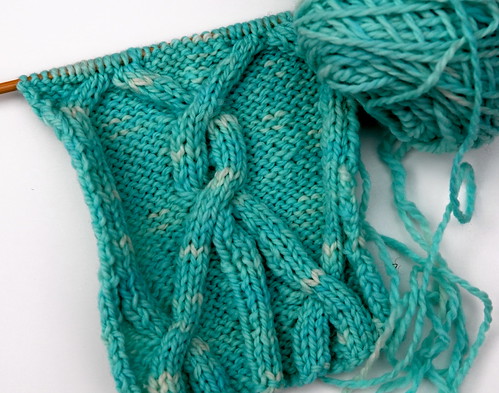
After lunch, I had a class on designing cables, with Fiona Ellis. Here's what I knit in class, just made up on the fly:

I had a bit of time for more shopping at the marketplace after class, but not nearly enough, since it was only open for about an hour after I finished.

On Saturday morning, I took Cat Bordhi's class on knitting the Coriolis Sock in her latest book, New Pathways for Sock Knitters.
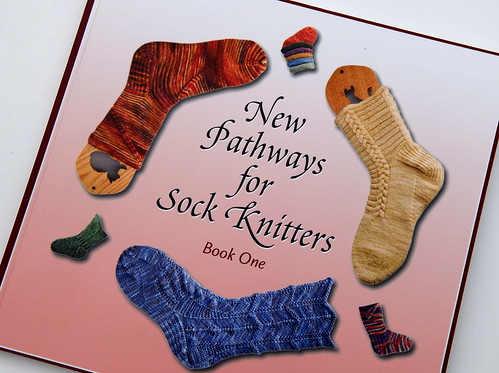

In order to have a chance to finish an entire sock in three hours, we made these wee little baby-sized socks:
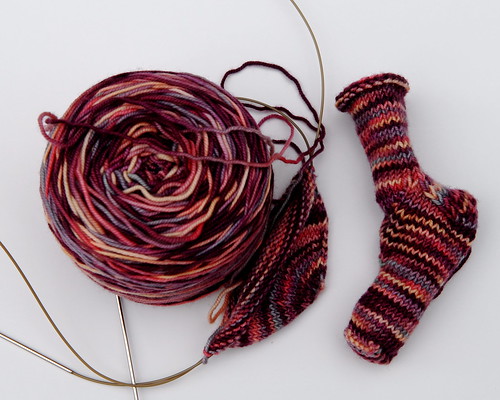

On the needles, you can see the full-sized Spiraling Coriolis that I started when I got home. The yarn is Socks that Rock mediumweight, Faulty Dyer colorway. The Coriolis sock is knit from the toe up, with a swirling band that wraps across the instep, and can continue spiraling around the leg if you choose that variation.

As I expected, Cat's class was informative and well-taught, with lots of little tidbits of knitting knowledge scattered throughout. One great piece of information I learned in connection with the class is that she has posted several instructional videos on YouTube -- we had to watch some of them for our pre-Stitches homework. You should check them out, just search "Cat Bordhi" on YouTube. That little bit of a Coriolis sock on the needles has now grown up past the ankle, but I haven't had a chance to take another photo.

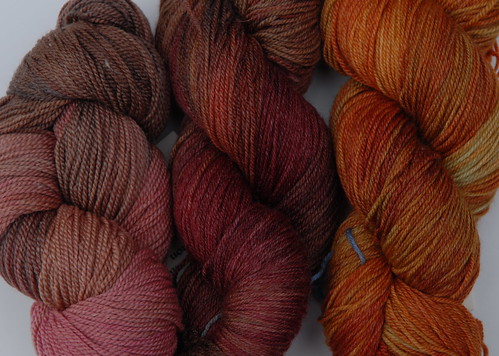
With class over, I finally got to spend as much time as I wanted in the marketplace. So much to see! It's like being in the world's largest yarn shop. Despite my resolve on Friday to resist the call of sock yarn, I succumbed at The Sanguine Gryphon's booth. And not just to one skein, but to three. But seriously, who could have resisted these amazing colors, especially after having just left a sock knitting class? I only wish this photo showed how subtly gorgeous they are.
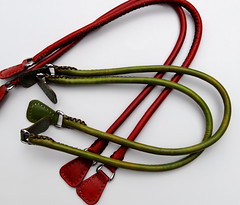
I also picked up some leather bag handles, fun reading glasses, and pattern booklets.

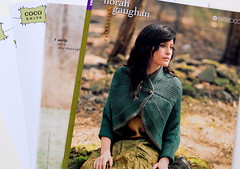


The Webs booth had samples of several of the sweaters from the Norah Gaughan booklet, and they were so much more beautiful in real life than they looked in the booklet. In particular, there's a cardigan with a big folded over collar that's absolutely stunning when you can get close enough to see the stitch pattern at the collar and cuffs.

One last purchase -- dyeing supplies. I got some dyes, and an instructional video, and some undyed sock yarn to practice with from Indie Dyer. I'm planning to try dyeing some Blue Faced Leicester fiber for spinning.


Stitches East moves to Hartford next year. I know a lot of people are disappointed that it won't be in Baltimore, but I've got family in New England, so I think I'll still be able to go. I'm hoping that I can convince my mother to go with me -- after all, she's the one who first taught me to knit.
Tuesday, October 14, 2008

An old project, finally finished ... and a new one, too

I spent lots of hours this past weekend on finishing work – if I have to weave in one more yarn end anytime in the next week, I may actually run screaming into the streets! When will I learn to weave in some of those ends along the way, instead of saving all 8000 of them (there were 8000, weren’t there?) until the end? Or maybe learn to spit splice to eliminate some of the ends? Luckily, TCM was running a Paul Newman marathon, so I recorded several movies I’d never seen before. Watching Torn Curtain while I worked made all that weaving quite a bit less painful.

The end result of all those hours of sewing and weaving was two finished sweaters. First, an old project finally done. I started the Urban Aran Cardigan way back in March, and got most of it done within a month or two. But once the weather turned warm, I set is aside for something lighter weight. I picked it up again in September, and finished all of the knitting three or four weeks ago. I kept procrastinating on the finishing, though, because I was intimidated by the zipper.


Most of the sweaters I’ve knit have been pullovers. There have been a couple of button-front cardigans (the Tangled Yoke and Nantucket Jacket), but I never put a zipper into a handknit sweater before. And I was awfully nervous about it. I started obsessing about it almost from the day I first cast on. Should I hand sew it? That might not be strong enough. Machine sew it? All my hours of knitting could get mangled up in the sewing machine.

So I started searching the internet for zipper installation tutorials, and found some really helpful ones. In the end, I followed the instructions here, at Pickin’ and Throwin.’ For anyone about to tackle a zipper, I highly recommend using the Wash-A-Way Wonder Tape she recommends to help position the zipper. That tape made it easy to line up the two front pieces, press them down onto the tape, and then unzip before pinning into place. Then I hand-stitched the zipper, using a backstitch from the wrong side.

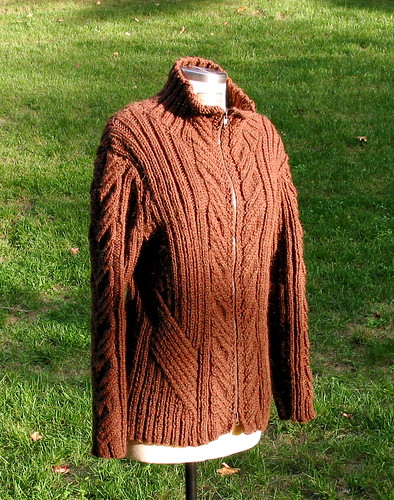
So here’s the finished product:
And here are the details:
Pattern: Urban Aran sweater, converted from pullover to cardigan following the example of Brooklyn Tweed.
Yarn: Elann Peruvian Highland Chunky in chestnut. The color of this yarn is gorgeous, much richer than you can see on your computer monitor. I bought 24 skeins (so long ago, I can’t remember how I calculated that amount), and I’ve got a lot left over.
Needles: sizes 10 and 10.5
Zipper: 2-way separating zipper, shortened to fit at the fabric store. The sweater is fairly long, so I wanted to be able to unzip it from the bottom when I sit down.


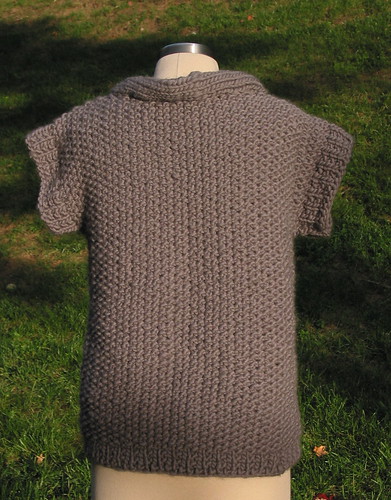
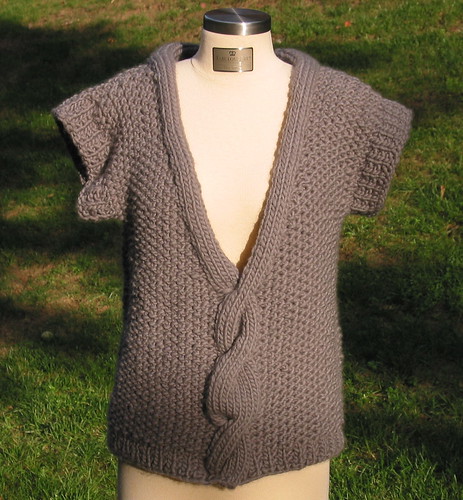
Now for finished project number 2. This one only took about 9 days from start to finish, because it’s knit in a very bulky yarn, and has no sleeves. Here’s the v-neck slipover from the cover of the new Debbie Bliss Knitting Magazine.


I fell in love with this sweater as soon as I saw it. A good friend of mine has been knitting Twinkle patterns lately using the super-bulky Twinkle Soft Chunky yarn, so I was inspired to try something in a heavier weight than I ordinarily use. I love the big cable up the front of this sweater, and the moss stitch shows up beautifully at this gauge. Now I just have to find a very lightweight top to put under it so that I can wear it here in Virginia without overheating.


The details:
Pattern: V-Neck Slipover from Debbie Bliss Knitting Magazine, fall/winter 2008-10-14
Yarn: Debbie Bliss Como in gray, 13 balls
Needles: size 13.
Gauge: The pattern calls a gauge of 3 stitches to the inch. I had to go down to a size 11 needle to get gauge, and thought the fabric was too stiff at that gauge. So I used the size 13s, and went down one pattern size to compensate.

Monday, October 13, 2008

Spinning in public for the first time

Well, I've done plenty of knitting in public -- when I first began knitting many years back, I used to take my projects onto the subway with me while commuting, and now I rarely go out without a knitting project, just in case I have some spare time. Now I've spun in public, too.

On October 4, I participated in the Art on the Avenue festival in Alexandria. I hadn't even heard of Art on the Avenue until I responded to a post on Ravelry looking for volunteers for a fiber arts demonstration. So I packed up my spinning wheel and a bag full of fiber, and headed out on Saturday morning. What fun! It was a gloriously beautiful fall day, sunny and warm without being hot. The demonstration included spinning on wheels and spindles, fiber carding, knitting, and weaving. In the beginning, I had some fairly quiet spinning time, just answering questions as I spun. But then I started letting the kids try the wheel, and we both had a really fun time. They were fascinated, and loved working the treadles (although some of them couldn’t reach them without help). And many of them were so excited when I offered to let them take home the yarn they’d help me spin – it was really sweet! It was tricky at first figuring out how to actually produce yarn with them, but eventually I got the knack of letting them treadle while I drafted the fiber.

Two hours flew past, and then we were finished. At the end, though, I found out that some of the other participants were members of a spinning group that meets twice a month – they invited me to join them, and I’m looking forward to spinning with them in calmer circumstances! And not only that, I got invited to another spinning demo the following weekend.

So this past Saturday, it was off to the Torpedo Factory Art Center for the annual Art Safari. This time I was prepared for the kids, and brought a basket of really soft blue faced Leicester fiber for them to spin with, and some pretty red and yellow wool. I also brought some drop spindles, to see if that would make it easier to work with them. Once we got going, there was barely a moment to catch my breath! We had spinning, and knitting, and carding, and weaving, just like the weekend before. This time, though, someone brought a drum carder to let the kids make up their own special, sparkly batts to spin. In the beginning, I focused on using spindles – I’d draft the wool while the kids kept the spindle spinning for me. Then for a while, we used the wheel – this group loved sitting and treadling as much as last week’s kids. It was especially fun when they had their own little handfuls of fiber to spin into a special yarn to take home.

I’ve only got one regret after these wonderful weekends – I forgot to bring a camera, so I haven’t got any photos! I guess I’ll have to learn to tuck a camera into my traveling spinner’s kit in the future.

Monday, September 22, 2008

Some sewing projects I've finally photographed

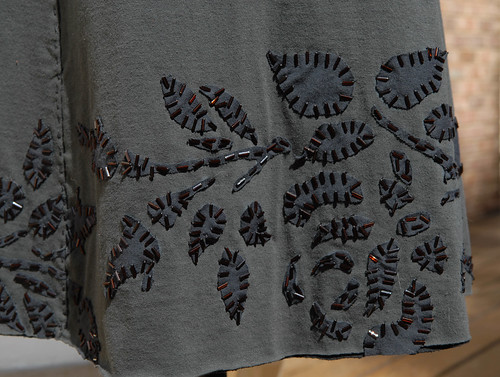
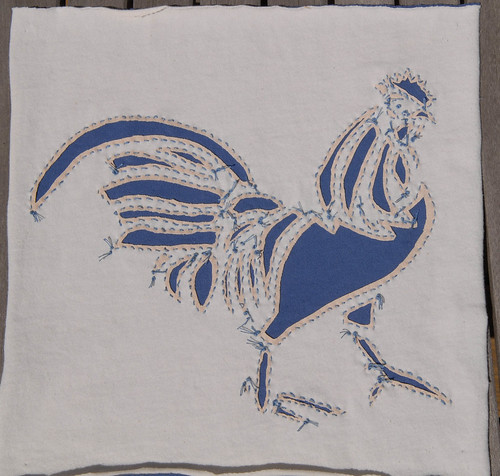
I finished sewing these weeks ago, but somehow kept forgetting to photograph them. So here's more from Alabama Stitch -- the Rose Applique Shawl, and beaded applique skirt:


The skirt was made from a kit that I mail-ordered from Alabama Stitch. The pieces were cut out and stencilled, and the kit included all the thread and beads that you need.

Monday, September 15, 2008

We interrupt this blog’s usual fiber-related content…

… for a detour into another of my hobbies, jewelry-making.

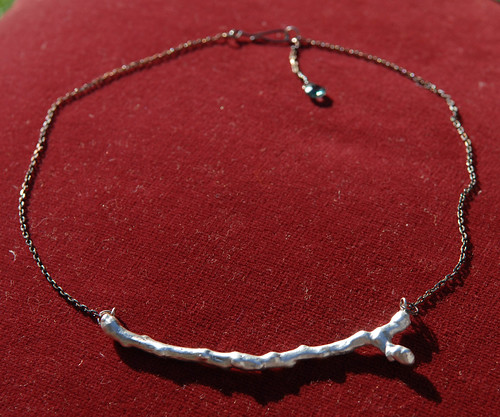
I love browsing on Etsy, and I’ve noticed a number of interesting pieces of jewelry incorporating a twig motif. So I decided to create one of my own.


The twig is made from precious metal clay. If you’re not familiar with it, PMC is an amazing product. Fine silver particles are bound together with a clay-like substance. While it’s soft, you can work with it just like any other type of clay. Roll it, shape it, texture it. But then when you fire it in a kiln, or with a torch, the binder burns away, the silver particles fuse together, and you’re left with a slightly smaller piece of pure silver that retains all of the shape and texture it had in its clay form. The pure silver isn’t as strong as sterling, but because it’s not alloyed with copper, it has a beautiful whiteness in color as compared with sterling.

Back to the twig – for this piece, I used PMC in paste form, thinned with water to a consistency that can be painted onto things. I painted ten thin coats of PMC onto a dry twig that I found in the woods, allowing the paste to dry thoroughly after each coat. Then I fired it in a kiln at 1650 degrees for two hours. When it had cooled, I soldered a jump ring onto each end and then gave it a slightly matte finish with a stainless steel brush. I prepared some silver chain, jump rings, and a handmade clasp, by oxidizing them with liver of sulphur. I attached the pieces of chain to either side of the twig, and added the hook and eye closure. Then, as a finishing touch I suspended a faceted tourmaline briolette from one end of the chain.


I haven’t done much jewelry-making lately, although I’d been thinking about it for the last couple of weeks. My new twig necklace has definitely inspired me to try to design some more pieces!

Monday, September 8, 2008

A few baby gifts, finally finished

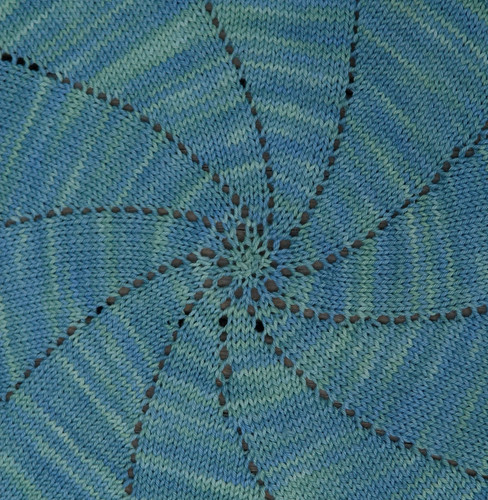
I finally got some baby gifts finished and packaged for shipping. For some reason, these projects having taken me ages to get finished. First, there are two pinwheel blankets:


These are knit from the pinwheel blanket pattern in the book knitalong. The yarn is superwash merino from Tess' Designer Yarns.


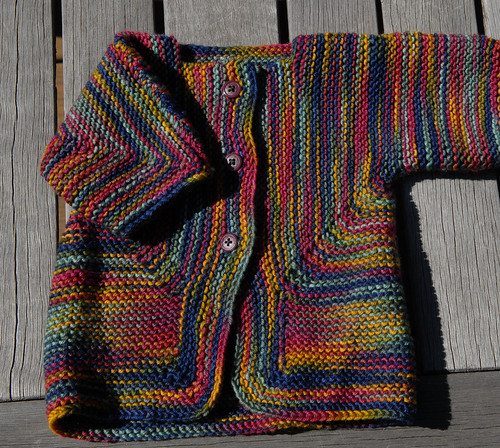
And this little Baby Surprise Jacket has been 98% finished for months -- all I needed to do was to sew up the seams at the tops of the arms, and add buttons. The baby it was originally intended for has probably long since outgrown it, but luckily there's a new baby in the family that I'm going to give it to. Maybe I should stick with blankets, since they can't be outgrown?!


Wednesday, September 3, 2008

What I Did On My Summer Vacation

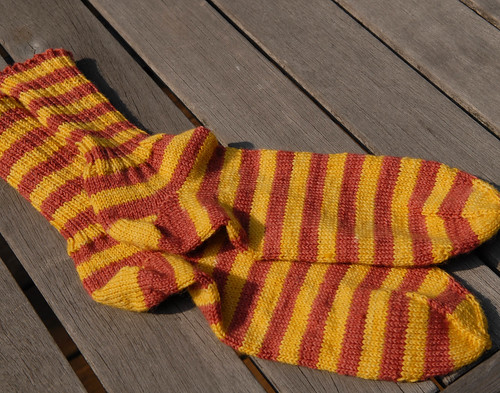
This year's vacation wasn't terrribly exotic, but it was fun and relaxing ... and I had lots of time to knit, sew, and read. We spent nine days on the coast of Maine, enjoying the sunshine, the cool temperatures, and the beautiful ocean views. We did a little bit of sightseeing every day, but spent lots of time just hanging out. That gave me time to finish the Harry Potter socks that I started for my daughter ages ago. These are knit from a hand-dyed self-striping yarn that I bought on etsy. The cuffs are a basic 2x2 rib, and the toe is the star-shaped toe from Sensational Knitted Socks.


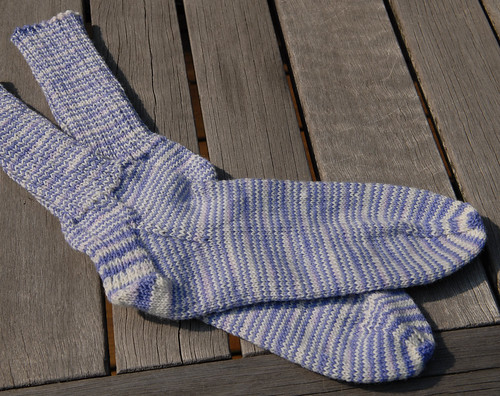
And I was able to knit another pair of socks for myself, too. (all those hours of driving back and forth to Maine allowed for plenty of knitting!) These are knit with a self-striping Lorna's Laces sock yarn that I bought at purl. The pattern is the Yarn Harlot's basic sock recipe, with ribbing all the way down to the ankle and a slight modification at the toe (after doing half the toe decreases, I started decreasing every row rather than every other row, in order to make a less pointy toe).


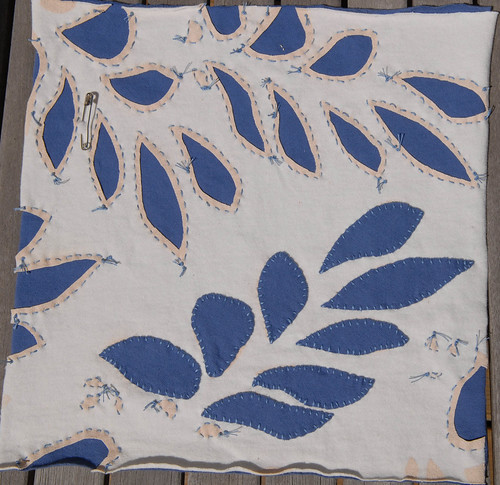
And I got a good start on the blocks for a quilt that I'm working on, from Alabama Stitch.


What a shame to be back at work, instead of making things! Oh well, the weekend's coming.